The TextBlade is an ultra-portable, highly-configurable keyboard. For casual users, it can be a superior alternative to the on-screen keyboard on a phone/tablet. For power users, it can be the one keyboard to rule them all - a highly customized productivity device able to be used with all computing devices. Using the TextBlade is no more complicated than using an on-screen keyboard.
On-Screen Keyboard Analogy
At the most basic level, the TextBlade is an alternative to an on-screen keyboard. While a typical QWERTY keyboard has around 100 keys, the iPhone's on-screen keyboard has less than 40 “keys” displayed at a given point in time. In order to type all of the symbols found on a standard QWERTY keyboard, one must employ multiple taps. For example, to produce { one must tap ![]() , then tap
, then tap ![]() , and then tap {.
, and then tap {.
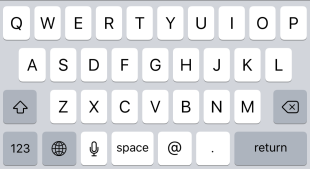
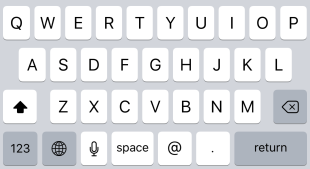
The standard on-screen QWERTY keyboard for the iPhone1) looks like this:
Tapping ![]() looks the same, but the next letter pressed will be uppercase rather than lowercase:
looks the same, but the next letter pressed will be uppercase rather than lowercase:
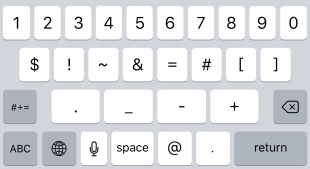
Tapping ![]() reveals the number layer of the on-screen keyboard:
reveals the number layer of the on-screen keyboard:
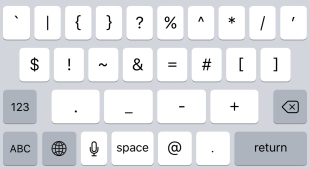
Tapping ![]() reveals yet another keyboard layer:
reveals yet another keyboard layer:
Tapping ![]() toggles with other on-screen keyboards that can be thought of as additional layers.
toggles with other on-screen keyboards that can be thought of as additional layers.
It all sounds somewhat complicated, but in practice it really isn't.
Basic Typing with the TextBlade
Similarly, the TextBlade has 37 “keys” and makes use of multiple layers to provide access to additional symbols not found on the default layer. With the TextBlade, additional layers are accessed by pressing a key, holding a key or combination of keys (known as a chord), or long pressing a chord. Again, it sounds complicated but in practice it really isn't. Early users have found that it is easy enough to use the keyboard for typical typing and employ hunt-and-peck methods for finding symbols found on additional layers. As one's familiarity grows, learning the layouts of the additional layers comes quite naturally.
While it may look overwhelming at first, thoughtful design has made the TextBlade easy for beginners to use and extremely efficient for avid users.
For example, the standard QWERTY keyboard layout contains some obvious layers as well as some additional layers that can be used to provide efficient keyboard shortcuts.
Alpha Layer Set
The ALPHA layer set is easily mastered and provides all the functionality needed to type.
The ALPHA layer contains the lowercase alphabet and a few punctuation symbols:

Pressing the SHIFT switches to uppercase letters and a few different punctuation symbols:

For most text processing, e.g., email, all you need to know is the ALPHA layer and corresponding shifted alpha layer to get by. This makes the keyboard extremely simple to start using. If you need some other punctuation symbol, you can hunt and peck on the Green layer.2)
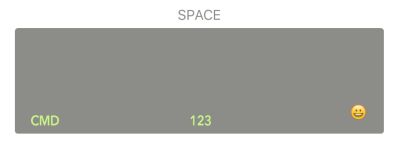
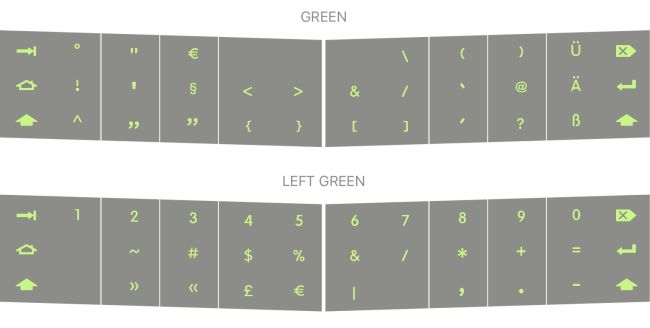
Holding down the middle of the SpaceBlade activates the Green layer:

A few more punctuation symbols are found on the Green-shift layer:

Shift and Green Modifier Keys
So far we've just have two simple modifiers to keep track of:
- SHIFT – You can hold the shift key down and press another key or use it as a sticky key (tap it and it remains active until the next key is pressed, much like the shift on an on-screen keyboard). As you would expect, you can also double-tap the shift key to engage CAPS-LOCK.
- Holding down the center of the SpaceBlade activates the corresponding Green layer. You can think of activating the Green layer as a second shift key. Hold it down when pressing another key and it changes the behavior of the key (just like shift).
So far this is all pretty simple and intuitive – we have shift and a second shift (that we call Green).
Control, Command/Windows, Option/Alt
The TextBlade doesn't have dedicated Ctrl, ⌥/Alt, and ⌘/Windows keys. To activate these modifier keys, the TextBlade uses the concept of a chord. A chord is just a combination of two or more keys depressed at the same time. For these modifiers, each chord consists of depressing two neighboring keys on the bottom row of one of the KeyBlades.
The placement of these chords matches the placement on standard Apple keyboards. For example, going from outer to inner on Apple platforms, the chords are Ctrl, ⌥, and ⌘.
| Apple Symbol | Apple Name | Others Name |
|---|---|---|
| ⌥ | 0ption or Alt | Alt |
| ⌘ | Cmd | Windows |
Modifier Chords
The Modifier keys are activated by using chords on the bottom key row.
The left and right blades in principle are meant to be mirrors but (at the moment anyway) the left and right blades are not exact mirrors as can be seen on the tables below. The (left) and (right) indicate whether the Left or Right version of the key is being returned although in the vast majority of cases the difference between left and Right is irrelevant (especially as many keyboards only have the Left variant anyway).
The above table shows the simple modifiers. It is also possible to get modifier combinations by using other chords as shown in the table below.
You will note that some combinations are available in more than one way at the moment. This is almost certainly an artefact of the firmware that might be removed at some point in the future.
On-Screen Keyboard
You can force the on-screen keyboard to be displayed by pressing all 4 home keys on the right-hand blade (JKL' on QWERTY layout).
Additional Layers
The capabilities of the TextBlade go well beyond just being a hardware alternative of an on-screen keyboard. Much of this additional power is wrapped in the concept of layers. The TextBlade provides additional sets of layers that are activated by pressing the appropriate chord.
Edit Layer
The Edit layers are activated with the edit chord ( ). Notice that the standard cursor movements are arranged in the familiar inverted-T towards the upper center of the RightBlade. This inverted-T arrangement is reused on many layers to provide consistency in layout. This consistency makes learning additional layers a breeze.
Select Layer
Using the select chord ( ) activates Select mode, which is the same as the Edit mode except selections are made when the cursor is moved.
Media and App Layers
NUM-Lock Layer
The NUM-Lock layers provide for easy entry of numbers:
Note: It is possible to activate the Edit layer directly from the NUM-Lock layer which can be really handy when navigating a spreadsheet.
Function Key Layers
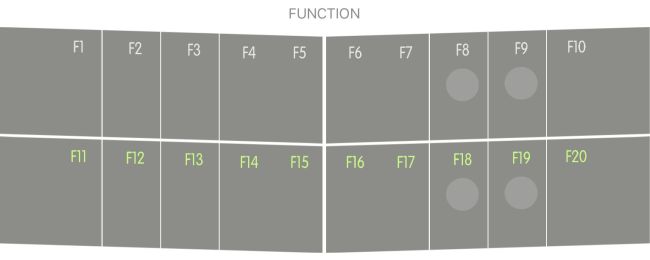
Function keys are accessible using the function key layers. Activating these layers is slightly different. To activate a function key layer uses the appropriate chord ( ). This chord is 'sticky' so you can either hold it down or release it and the next key is from the Function layers. LEDs on the SpaceBlade will let you know when you've held the chord long enough. The basic Function layer gives you F1-F10 and you can then use the Green Layer to get at F11-F20. Two LEDs on the SpaceBlade will illuminate to indicate that the function key layer is active.
Macro Layer
The Macro Layer is rather like the Function layer in that the chord to activate it acts in a ‘Sticky’ manner. You can thus have a different macro associated with any key. More detail on Macros can be found in the Macros sub-section of this wiki.
Alternative Keyboard Layouts
The TextBlade app provides a number of other keyboard layouts. You can browse all of these options in the TextBlade app.
For example the alpha layers are mapped differently for
Dvorak
Colemak
Emoji
There is also a Emoji layer available by pressing the right-side of the SpaceBlade. This currently only works on iOS using the TextBlade keyboard extension.)
International Layouts
Some of the international keyboard layouts have additional layers. For example, QWERTZ includes a Left-Green layer that is activated by pressing the left-side of the SpaceBlade.
Customizing Layouts
For those with MultiMap, it is possible to customize the layouts of the different layers so those who are interested in specialized mappings can set them to be whatever they want.
Additional Layers/Hot Corners
If you are using an English layout then there is a feature called Hot Corners (available under the Features section of the TextBlade app) that provides an alternative way of generating some of the most common modifiers (CMD/CTRL and ALT). These are activated by pressing on the left or right-sides of the Space Blades (rather than the center).
If using a non-English layout then this feature is used to access additional layers instead. For international maps the left side of the SpaceBlade accesses an additional layer (Called the Left-Green layer) for accessing additional symbols and the right side does nothing.
If you have the Emoji map installed then the right-side of the SpaceBlade is used to access the additional layer that contains all the Emoji symbols. If you have hot corners enabled then the left side of the SpaceBlade is still available to generate the CMD/CTRL key, but the right side has been pre-empted to access the Emoji layer so does not generate the ALT key.


