Troubleshooting
Ideally the TextBlade will function exactly as expected, but if your TextBlade seems to be behaving unexpectedly, this section may be useful. It contains suggestions for things to try when things don't seem to be working as expected.
Jump Away
One quick technique that sometimes will reset a confused TextBlade is to jump to a different slot and then jump back. Some have noted that this works better if one jumps to a jump slot on the opposite KeyBlade of the current jump slot.
Rebooting
On occasion when something doesn't seem to be working a reboot can fix the problem and is an easy first thing to try. To do this:
- Disassemble the TextBlade by pulling the two blades down towards the space bar. This breaks the connection.
- Wait for the lights to go out. This powers down the TextBlade.
- Slide them back up to the normal assembled position. Lights come back on briefly - typically two patterns - so it is now back on.
This typically solves many problems. A common one is, after turning on the TextBlade, trying to start typing before the light sequence is done. It just won't type anything. Likewise if trying to switch Jump positions (you may get one set of lights or two) and starting to type too soon. Simply do a restart, making sure the light sequences are complete both for powering down before reconnecting and after powering back up or switching Jump positions.
Key "Sticking" or Not Registering Properly
Some users have reported a key appearing to act in a 'sticky' manner, or register the incorrect key value when pressed. It appears that this can be caused by a hair or dirt or something similar getting under the KeyCap and interfering with the underlying spring and sensor mechanism.
The simplest solution is to disassemble the TextBlade into its constituent parts, and then to sharply rap the blade experiencing problems on its edge against your leg to dislodge the obstructing material. In most cases this seems to dislodge the material causing the issue and on re-assembly the TextBlade functions normally again.
A more extreme case might require the KeyCap to be removed and then carefully using a light brush to remove any material under the key.
A completely different cause may be a weak Bluetooth connection. If you encounter this issue and are using a Bluetooth dongle, using a USB extension cable to get the dongle in closer proximity to the TextBlade may help.
Removing the KeyCaps
The KeyCaps on the KeyBlades are designed to be user replaceable. This is easy enough to do if you are careful, although it is recommended that you do not do it too often.
WayTools have provided a video demonstrating how to remove the KeyCaps. While it is not difficult to remove the KeyCaps, there is definitely a bit of a knack to it as it requires a slight twisting motion that the videos show quite clearly.
Video demonstrating removal of the KeyCaps from the TextBlade
Replacing the KeyCaps
Each key has Butterflies that must be interlaced properly. There is a claw feature and a flat feature. The claw must go on top of the flat feature. At this point, the butterflies should be linked and you can push one side and the other should follow. If one side works but the other doesn't then you don't have the claw and flat feature assembled properly.
Next, you slip one of the vertical sides of the key in question onto their respective butterfly ears (y, h, n or backspace, enter, shift for the right KeyBlade KeyCaps). You can test to see if the butterflies are operating correctly, just by pushing on the KeyCap. The last step is to gently snap the other side of the KeyCap over the remaining butterfly ears.
WayTools have provided a video demonstrating how to reattach the KeyCaps.
Video demonstrating putting the KeyCaps back onto the TextBlade
Blade Not Connected Properly
There have been times when the blades have not all connected together properly. Normally this will be due to the blades being misaligned, although it can also be a result of dirt or other debris on the contacts. If this condition is detected by the TextBlade then the LED lights on the SpaceBlade will display the following pattern:
IMAGE NEEDED HERE
The solution is simply to clean the contacts and then reassemble the TextBlade.
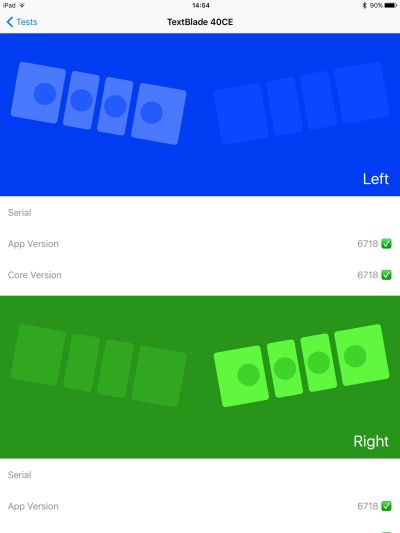
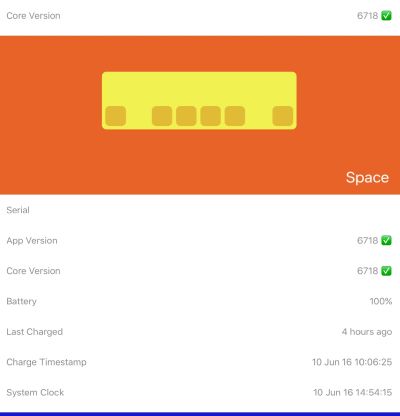
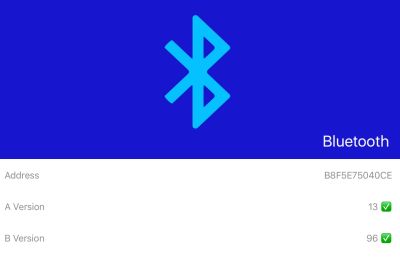
If by any chance either of the KeyBlades completely fails, then this can be detected by running the Check test and seeing that no information is returned for a specific KeyBlade.
On a good test the information returned by the Check test should look something like the following:
This condition is extremely unlikely to occur, but if it does you will need to contact WayTools.
Disassembling the SpaceBlade
If you have an issue where the TextBlade spontaneously powers down then it is possible that there is a loose connection inside the SpaceBlade. However before assuming that try cleaning the contacts between the keyblades and Spaceblade to ensure that it is not simply a bad connection at that level.
The following describes the procedure to disassemble the Spaceblade.
On the underside there are plastic clips moulded in to the Spaceblade plastic. These are about 5mm toward the center from the feet on the same long edge of the Spaceblade as where the Keyblades connect. Using a spudger or thin blade lever the plastic out and down, away from the metal. Gradually work left and right side until free. Metal lugs act as a hinge on the opposite edge; pulling the plastic and metal laterally apart the hinge will disengage. Flex cable joins the top and bottom of the Spaceblade and a loose connection here could be the cause of intermittent power issues. The connector used in older TextBlade models is a weak point and known to cause failure. The flex cable here is what may fry the TextBlade as power from the battery is distributed through here to the circuitry of the rest of the TextBlade. If the flex is inserted or removed at an angle, power from the battery may be sent through the wrong part of the Spaceblade causing irreparable damage.
On the flex connector is a black toggle used to lock the flex in place. It may be unlocked by flicking vertical by using a fingernail. From the factory a combination of the flex connector lock and a thin glue is used to keep the flex in place. For earlier revisions of the TextBlade this is a known failure point. The connectors on newer TextBlade models are much more robust.
It is quite fiddly to insert the flex back in to the connector and then lock down the black toggle and then keep the top and bottom Spaceblade parts aligned while trying to reassemble. Once aligned, one suggestion is try using a small bead of silicone or hot melt glue to fix the flex in place.
An alternative is to use a thin tape on the rear of the flex (away from the conductive bits) may give the connector a bit of a hand in keeping the flex in place. Single sided sticky tape (e.g. Cello tape) is appropriate.
- Take an inch of tape and stick the flex, electrical contact side down on a cutting mat.
- Trace around the flex with a hobby knife to remove excess tape. Do not cut in to the flex itself.
- Insert the flex in to the connecter and press down the black locking toggle.
Reassembling the Spaceblade there are only a couple of items to be conscious of;
- keep the flex aligned at all times to prevent a short
- the metal lugs need to be on the correct side of the magnetic arms to allow the Spaceblade to actuate
- a thin strip of flex is present on the same edge as the charger. Feed it gently back as you reassemble. Use a fingernail to prevent it from getting crushed or stripped.
If all the above has been successful then connect the Keyblades and the TextBlade should be like new!
Incomplete Firmware Update
If, as a result of the Check Test any of the blades cannot report their firmware is intact, it is likely that an OTA update did not complete successfully. There have been (rare) cases reported where it appears that firmware has been corrupted during normal use and in this case the recovery process is the same.
The resolution is to re-run an update to the current firmware. If this fails then you will need to contact WayTools.
The process for running the firmware update is:
- Ensure that the jump for the device running the TextBlade app is selected.
- In the TextBlade app select the Updates section.
- In the Updates section select the appropriate firmware level. Normal users will only have access to the Release section although Waytools may grant access to other sections if they deem it necessary (TREG testers for instance are given access to the beta section).
- Press the 'Install' button to initiate the firmware upgrade process.
- While the firmware upgrade process is running you will find that progress is indicated by the blades slowly turning green from left-to-right.
Once the firmware update process has completed then the TextBlade should be back in normal operation.
Promiscuous Mode
Under certain circumstances the TextBlade has been known to go into so-called 'Promiscuous Mode' if repeated errors have occurred. This mode is identified by a single LED blinking pattern as illustrated in the following video:
In this mode the TextBlade is looking for any suitable device it can pair with to reset its firmware.
The recovery process assumes that you have a device that can run the TextBlade app. At the moment this means an iOS device (iPhone, iPod, iPad) running iOS 8 or later. Support for other devices (e.g. Android) has been promised but is not currently available.
The steps to recover are:
- Switch off any other Bluetooth devices that are in range to reduce the chance of confusion over which device is the TextBlade.
- Go into the Bluetooth setting for the device running the TextBlade app and attempt to add a new Bluetooth device. The TextBlade will show as an 'accessory' device, and will pair without needing a pairing code to be typed on the TextBlade.
- In the TextBlade app select the Updates section.
- In the Updates section select the appropriate firmware level. Normal users will only have access to the Release section although Waytools may grant access to other sections if they deem it necessary (TREG testers for instance are given access to the beta section).
- Press the 'Install' button to initiate the firmware upgrade process.
- While the firmware upgrade process is running you will find that progress is indicated by the blades slowly turning green from left-to-right.
Once the firmware update process has completed then the TextBlade should be back in normal operation.
Media keys do not work when using a dongle
This is a known limitation when using the TextBlade with a dongle. The following describes the issue in more detail for those who are interested:
There are two types of key codes that can be sent by Bluetooth or USB keyboards. The first class of codes are called standard scan codes. These include all of the keys from a traditional 101 key keyboard including letters, numbers, symbols, modifiers, function keys, etc. There are uniform codes for these that every keyboard uses. The second class of codes are called consumer usage codes (or sometimes bitmapped codes). These include specialized functions like play, pause, volume/brightness control, etc. These codes do not have predefined standard values. Instead, they are declared specifically by each keyboard at pairing time for a Bluetooth keyboard, or when a USB keyboard is initially plugged in.
WayTools will be providing a dongle for use with the TextBlade called the WayTools Air-In. The WayTools Air-In dongle is configured as a USB proxy dongle, which means that it appears to the host as a simple USB keyboard, but “under the hood”, it forwards key codes from the Bluetooth keyboard (in this case the TextBlade) to which it is paired. This configuration allows it to work completely independently of the host's Bluetooth software, or even on hosts which don't support Bluetooth at all. Like other commercially available USB proxy dongles, the Air-In only supports standard scan codes by default, since it has no way of knowing ahead of time what consumer usage codes will be defined by the Bluetooth devices to which it will later be paired. The current Air-In is a uses the same standard pcb, chip and stack as is used by laird 820 dongles. After general release of the TextBlade, it is intended to develop and offer a smaller Air-In with a customized stack. Custom onboard software will specifically include the consumer usage codes supported by TextBlade. That’ll let the special media layer codes work with the dongle. This is not expected to be a large scale dev effort, but it will not be done until after the TextBlade has gone on general release.
Bluetooth Switched off by power Management
Laptops are often set to turn off Bluetooth after a period of not using it such as after using the TextBlade on an iPad for a while. The solution is:
Windows 10:
- Right-click on Start, and select Device Manager.
- In Device Manager, click the arrow next to Bluetooth, and select the Bluetooth radio.
- Right-click the Bluetooth radio and select Properties.
- Select the Power Management tab, and see if there is a check next to Allow the computer to turn off this device to save power.
MacOS:
- TBD
TextBlade appears to be 'dead'
There have been a few cases reported during TREG testing where the TextBlade appears to go 'dead' in that it will not power up when you tap on the left of the Space Bar to wake it or when you assemble it. This can happen even though there is no obvious physical event that might have triggered it. If it is in this state then if you plug the SpaceBlade is plugged in for charging then it appears fine and the LEDs you would expect from a charging cycle are illuminated on the SpaceBlade. Normally plugging the TextBlade in for just a few second in charging modes is enough to rectify the original problem.
There have also been a few cases where the TextBlade still refuses to power up properly after trying the above when re-assembled by re-attaching the Left and Right Blades. The exact cause of this is unknown, but if you leave the TextBlade disassembled overnight then it may rectify itself. Why this happens is unknown but it is surmised that there has been some corruption in the internal RAM or flash that has meant the firmware gets into at indeterminate state. Eventually one of the many watchdog times built into the TextBlade and things get reset to a known state.
If this this happens then it is recommended that you do the following when you get the TextBlade to power up again:
- Connect the TextBlade to a device running the TextBlade app.
- Use the option under the Features part of the Settings area to put the TextBlade back to factory settings (Not sure if this loses existing pairings - this needs to be checked out)
- Reapply the latest firmware update
- Reapply all your custom settings, though applying the latest firmware should do this, reapplying has been found to help
Once the TextBlade has recovered from this state then it is highly likely that it will not occur again. However if it does then WayTools should be contacted as there may be some underlying non-obvious hardware issue with the TextBlade in question.


